Monday, April 30, 2018

Challenge Winners - Elegant Jewels

Hi everyone! Today we announce our top picks from the 'Elegant Jewels' challenge. We loved seeing your bejewelled entries in all their varied and creative forms. Thank you to everyone who took the time to join in the fun.


Having taken time to look at them all the Design Team chose #3 Carol Lee who shared this fabulous card. We loved the jewel colours and accentuating gems alongside that fabulous flower. Congratulations to Carol on being our favourite and winning the opportunity to be a Guest Designer here at Frilly and Funkie for a future challenge. You will be contacted shortly with all the details.

And now for the three winners of our Frilly and Funkie Top 3 Badges for this challenge; the choices this time were, in numerical order; #13 Stacy, #14 Wendy and #20 Rox. Please email Linda at thefunkiejunkie@gmail.com for the codes for the Top 3 badges so that you can display them proudly on your blog.


And finally we have a randomly chosen lucky winner for the $25 gift certificate to The Funkie Junkie Boutique. Our congratulations this time go to #17 Sherry! Please email Linda at thefunkiejunkie@gmail.com for the gift certificate details.

A big thank you again from the Frilly and Funkie team to everyone who took part in this challenge and congratulations to all our winners. The current challenge, 'Neutral Point of View' runs through Tuesday, May 8th and the Funkie side of the Design Team will be back here on Wednesday May 2nd with some more inspiration for you. We hope to see you entering this time around so that you too can be in with a chance to win.

Have a great week everyone!

Saturday, April 28, 2018

Saturday Showcase - Fabric Paper

It is Cec here and I am presenting the Saturday Showcase this week showing you how I make fabric paper.


I started with a piece of cotton canvas-like fabric and painted it with acrylic paint. For this piece I used a brayer to add Lemon Zest and Squeezed Orange Acrylic Paint (Dylusions) and I purposely left some white space.

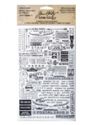
Next I used some Jet Black Archival Ink (Ranger) to stamp some flowers from a set called Flower Garden (Tim Holtz).


Once the stamping was dry, I crumpled up some tissue, opened it back up and glued it over the fabric using Mod Podge. While it was still wet, I carefully patted it down so it was completely attached to the fabric. Do not pull on it while it is wet because the tissue will tear.  Once it was dry, I trimmed the tissue away.

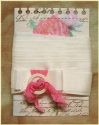
Now that my fabric paper was ready, I decided to make a purse card with it so I trimmed it down to 5" wide x 12" long and then adhered it to a piece of yellow card stock. In the future, I would attach the card stock in sections and leave the area where the folds are free of card stock.


I wanted the flap of my purse to have a fancy edge so I traced a fancy edge on the card stock side using a template that I picked up at the dollar store and then fussy cut it.


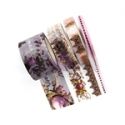
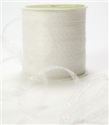
Next I added a "strap" made from a string of pearl trim (my stash) and covered the area with a strip of the fabric paper.  If I had not put card stock in the crease area, the trim would have fit better, I think but it is still fun.  I added a pair of adhesive Velcro circles as a fastener.


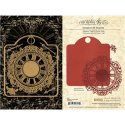
Using some paper from Voyage Beneath the Sea (Graphic 45) and the Pinwheel Posies die (Tammy Tutterow) I cut several flower petals and layered them.
I also cut a strip of the same paper to add to the edge of the portion that folds up and used a lace edge punch to give it a fancy edge.


To finish my purse card, I inked all the edges with Rusty Hinge Distress Ink (Tim Holtz), added a strip of venise lace on the front of the flap, glued seed beads to the flower centre and then adhered it to the flap.

Here are a couple more examples of fabric paper that I made:


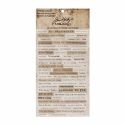
For this one, I used a brush and painted Melted Chocolate Acrylic Paint (Dylusions) on my canvas.


Because the brown is so dark, there is no stamping this time but after the tissue was dry, I ran it through a Pinwheel Embossing Folder (Tim Holtz) to give it a bit of a faux leather look although any embossing folder with a repetitive pattern would have worked. Tip:  If you don't crumple the tissue too tightly, there will be less texture from it and the embossing will be more pronounced.  A lighter brown paint would also look great but after it was embossed, I would go over the whole thing with some Distress Ink in Walnut Stain or Gathered Twigs Distress Ink for example to make that embossing pop.


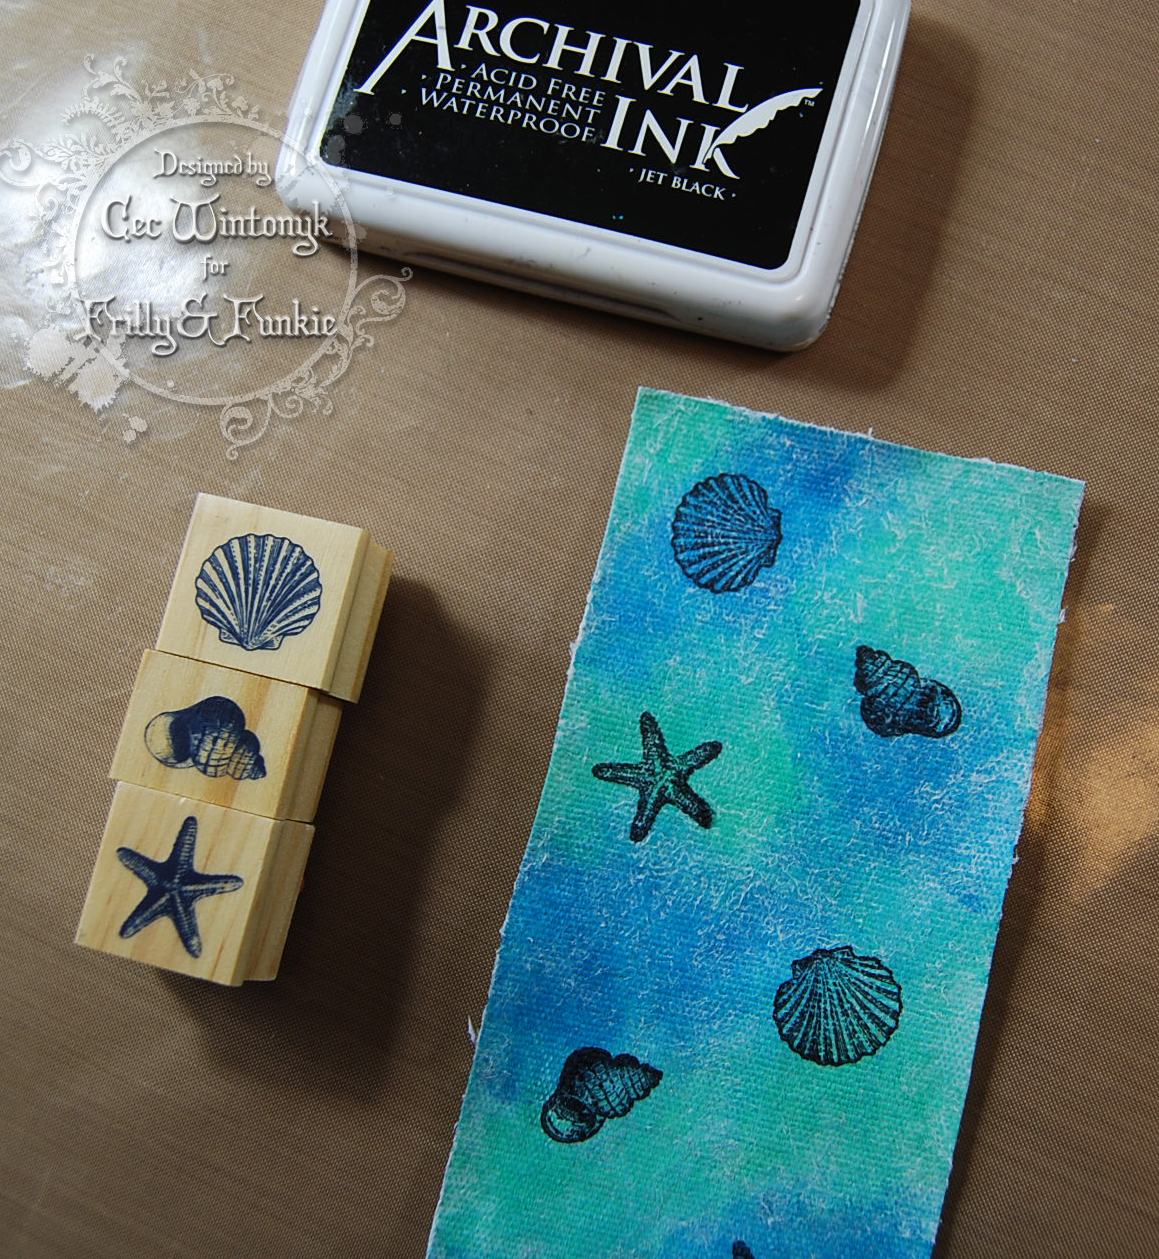
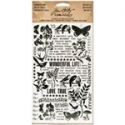
For this one I used a sponge to add Mermaid Lagoon and Cracked Pistachio Distress Paint to the canvas.


Jet Black Archival Ink was used again to add some shell stamps before I added the tissue. I used some individual stamps from my stash but a border stamp would look great too and I have linked one below. You can use it along one edge or use parts of it randomly over the fabric paper piece.
Note:  If you want your stamping to be more vibrant, add it on top of the tissue but be aware that you will not be stamping on a smooth surface so bits of the stamp may disappear.  You can also use stencils to add pattern to your fabric paper - either under or over the tissue layer.

There you have fabric paper - fabric that is still flexible but has the feel of paper.  I have plans to use the brown and blue samples in future projects so even small pieces are useful in creating and I hope you will give this a try.

Thursday, April 26, 2018

Guest Designer - Wendy Baysa

It is time to introduce our Guest Designer for the Neutral Point of View challenge. Please say hello and give a warm welcome to Wendy Baysa of Dabble Doday. Wendy was the Top Pick for the Knock on Wood challenge.


Hi! I am so excited to be here!

I have been creating for as long as I can remember. I am a mother of three (late teens now) and have been married 22 years, living in the ever changing weather state of Michigan. I am blessed that my hubby gets that I am happiest when I am doing something creative and have been able to dedicate my days to it full time. I jump from medium to medium every few days to keep me inspired, which include sewing, acrylic canvas painting, paper crafts, scrapbooking, home decor, mixed media, art journaling, furniture up-cycling and my favorite, costume making. Actually if I am inspired by something, I will take it on for a good challenge. I am self taught and always looking for something new to try.

I would like to thank the DT for allowing me this opportunity.  Have a blessed day!


When I reviewed what the challenge would be, my mind went full throttle forward,lol, knowing how fun the project would be getting all the different tones & shades with a grey base. And with Mother's day right around the corner, there was no doubt I would be using the new Tim Holtz collage paper as the base.


* * *
To get all the details for Wendy's neutral canvas for Mom, pop on over to her blog and then come on back and share your neutral creation with us. The Neutral Point of View challenge can be found HERE.

There will be another fabulous showcase on Saturday and next Wednesday the Funkie girls will be sharing their inspiration so check in often and don't miss anything.

The Neutral Point of View challenge runs until 11:55 pm EST on May 8th.

Saturday, April 21, 2018

Saturday Showcase: Prima Love Story Altered Paper Bag Pocket Card Tutorial

Hello, Friends!  It's Kathy on board for this week's Saturday Showcase.  One of my favorite crafting pursuits is to alter common household items into a beautiful piece of art.  Paper lunch bags are loaded with potential, cheap and readily available and so much fun to alter.  I've dressed this standard lunch sack up with soft, shabby chic papers from  Prima's Love Story 12" x 12" collection.


This is a real Cinderella story!  The humble brown bag (white in this case) has been transformed into a multi-pocket card filled with all sorts of goodies like ATC tags, mini photo wallets, gift card wallets, art tags and more.  The lunch bag I started with measured 5 1/8" wide x 10" tall.  With just a few simple folds, a quick visit to the sewing machine and the addition of hand dyed seam binding ribbon and Prima flowers, you have a gift fit for a Queen!


You can create this bag without using a sewing machine, too.  I just find it's the quickest way to get the job done.  But if you prefer to use adhesive, go for it!  Just be sure to only add it to the sides, or you lose the ability to open the pockets.

I've prepared a quick video tour of the altered bag and all its contents for you, followed by a very simple tutorial showing you how to create the base and the pocket liner panels.  I've left it to you to fill and decorate your bag as you see fit.

Are you ready to get your craft on?  Just click on the play button, and we're off on another crafty adventure!


I hope you'll never look at a paper lunch bag the same way again!  Thanks for joining me!

Cheerio,
kathy

Product Links to the Funkie Junkie Boutique

Note: I could not get the Thumblinky to grab the image for the Graphic 45 Large Ivory Tag Album, but you can find it HERE.


Wednesday, April 18, 2018

Elegant Jewels

It is Cec here and I am your hostess for the current challenge. I am calling it Elegant Jewels and here is how I describe it: Let's make a vintage or shabby chic project in jewel tone colours such as deep purple, emerald green, jade green, burgundy, bright turquoise to name a few AND to make your project extra special, add some sort of jewel or gem, which can be anything from a dollar store find to a piece of broken jewelry.

The winner will earn the chance of a Guest Designer spot here at Frilly and Funkie, and everyone who enters and follows the rules will go into the draw for the chance to win a $25 spending spree at The Funkie Junkie Boutique. And there are Top 3 Badges for three further outstanding entries, chosen by the Design Team.

The guidelines for entering are simple; create a new vintage or shabby chic project following the challenge theme, link it below to your post (not just your blog) and also include a link back to this challenge in your post. You can combine our challenge with up to 10 challenges (including this one) to have a chance of winning. If you are entering through a public forum (such as Instagram) you'll need to include the words Frilly and Funkie Challenge. Also, please be sure to turn off your Word Verification so our Design Team can leave comments on your blogs. Make sure you follow these rules as unfortunately we have had to eliminate entrants from the prize draws in the past.

This week the Funkie side of the team are here with some wonderful inspiration for you. To get the details of their creations, just click on their blog names and you will be taken directly to their posts.

Sara Emily - sarascloset

Suzanne Czosek - Suzz's Stamping Spot

Jenny Marples - Pushing The Right Buttons

Zoe Hillman - iGirlZoe


**************************************************
WEEK ONE

The Frilly side of the team are here today with some fabulous inspiration for you. To get the details of their creations, just click on their blog names and you will be taken directly to their posts.

Autumn Clark - SewPaperPaint

Cec Wintonyk - CW Creations

Kathy Clement - Kathy by Design

Once you have checked out their projects, we hope you will join in on the challenge and share your creation with us. The challenge runs until 11:55 pm on April 24th so you have lots of time to create.

In the meantime come back tomorrow to see what our Guest Designer has created and then next Wednesday the Funkie gals on the team will be here with their inspiration.