Hi! Suzz here! I am going to share a fun technique that I am calling Faux Leather! When I saw the current challenge '
Timeworn' hosted by Autumn, I started thinking about weathered, worn leather.
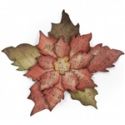
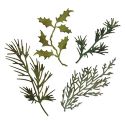
I decided I wanted to achieve the look and feel of an aged leather book binding or jacket. I also went down a path of experimenting with various textures on my poinsettia and I am going to share my inspiration with you!
To create the leather texture:
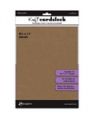
1. Gather up some sheets of kraft cardstock and a water spritzer.
2. Cut your kraft cardstock to the size of your card base or in smaller pieces to help with the texturing process.
3. Spritz the paper on both sides with the water until saturated.
4. Now the fun begins. Take that wet cardstock and crumple it up in a ball. Open it up and crumple it up in a different shape. You can also use a rolling pin to add pressure to the crumpled up ball. The more wrinkles the better.
5. Open up your cardstock to see what texture you have achieved. If you are not happy with your weathered effect, keep going. You can also use sandpaper or a distressing tool to scrap the surface to add more effect.
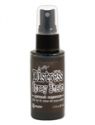
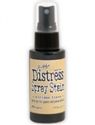
6. Drag your dye ink pad (I used Ground Espresso) across the surface to capture ink in the creases. I am showing you how it looks on a flower cut from the paper created in the previous step.
7. Spritz with water to allow bleeding of the ink around the wrinkles. Then spritz with distress ink sprays to add the color of leather you want to emulate. I used ground espresso but depending on how much you apply will make your leather darker in color.
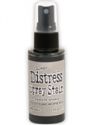
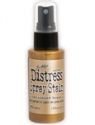
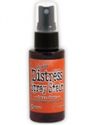
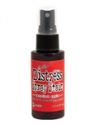
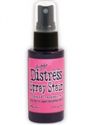
8. I used a variety of distress sprays to add layers of color and mixed lighter sprays (antique linen, pumice stone, gold mists) to give a variety of colors. A couple of other tips: If it gets to dark keep adding water and dabbing off ink using paper towels. Or even just flip it over and use the other side!
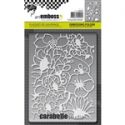
9. Emboss the leather with an embossing folder for another layer of texture.
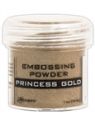
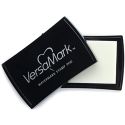
10. Add a touch of distressed gold to age the surface. I used a Versamark pen or glue pen to add a sticky surface around the embossed area. I then sprinkled the gold embossing powder on the surface.
11. After knocking off the excess embossing powder use a brush to brush off even more of the embossing powder to get a more aged worn effect. Then heat the powder to set the color.
Now onto the poinsettia:
1. Cut flower layers from the same textured kraft cardstock. I cut a series of 3 sets of petals.
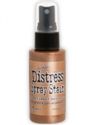
2. Distress with ink pad and spray with mists to get colors desired. (I added a hint of antique bronze to the mix).
3. Emboss with embossing folder to add a pretty floral pattern.
4. Add watermark ink or glue on embossed areas.
5. Sprinkle off excess powder and heat to set the gold color.
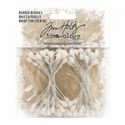
6. The center was the soft beads sprayed with a distress spray and dipped in the embossing powder. Then heated to get the gold color to set.
7. Assemble the flower. I used multiple layers of the same size with glue dots between the layers.
I had so much fun with the leather poinsettia I wanted to try a few other types of paper to create more poinsettias: I used Wendy Vecchi's newsprint paper and created this beautiful flower:
1. Start with the layers cut from the newsprint paper.
2. Spray them until saturated with water.
3. Spritz a distress spray ink on acetate/slick surface and paint the edges of the flower with a waterbrush. Add more color or less to get the effect you want. It will seep as you have saturated the flower with water.
4. Let dry. Then stamp with snowflake image using archival ink. (the archival ink will keep the image from bleeding.
5. Use a watermark pen or any watercolor marker close in color to the edges of your petals and do small sections to allow you time to dip in embossing powder and have it stick. You could also use a glue pen.
6. Dip in embossing powder or sprinkle with embossing powder and shake off excess.
7. Heat emboss the edges of the flower. Repeat for all layers and assemble flower.
Finally one last poinsettia created with tissue paper. These are very fragile and the layers don't look like anything but once assembled you have a gorgeous soft flower.
1. To cut the tissue paper flowers I take folded sheet of tissue paper and cut them with multiple layers. I then picked up the layer by the center and pinched them.
2. I filled a little dish with water and added the distress ink spray. Re-inkers would have worked just as well in the water.
3. I dipped the ends of the petals into the died water which then seeped upwards into the centers of the flower petals. I let this dry. I used a heat gun to help dry the flowers.
4. I sprayed all the layers with antique linen to get an aged color.
5. Then I stamped a few of the layers with fine text in a brown ink. I then just assembled the layers with a brad. The tissue paper is fragile so using glue dots or glue might have been too easy to tear the layers.
Well I hope you have enjoyed the tutorial and are inspired to try creating your own faux leather!
Suzz