Friday, October 28, 2016

Friday Focus - Dina Wakley Media

Double click any image to zoom in for details.
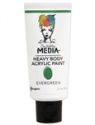
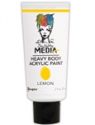
Hello everyone, Linda here pinch hitting this time with our bi-weekly Friday Focus.  This time we are focusing on Dina Wakley Media products.  All of the Dina Wakley Media products at The Funkie Junkie Boutique will be reduced an additional 15% for the next two weeks.  Coupled with our normal 20% discount, that means you can (almost) steal these goodies for 35% off list!

I went out on a limb when I volunteered to do this focus on Dina Wakley's products.  If you know me, you know that this is so NOT my style, but I thought it would be fun to play around with Dina's amazing acrylic heavy body paints, stencils and stamps.  
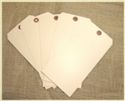
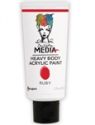
I began my assignment by watching a number of You Tube videos by Dina trying to get a feel for her techniques.  Then I started to play.  I did struggle some and ended up with a few non-starters, but I finally (sort of) got the hang of it.  Both of these tags started with a white gesso base.  Dina recommends that you always start with a substrate with a coat of gesso before applying her paint.  I dry brushed the paint on, leaving some texture.  Dina's brushes are very coarse which lends them to leaving brush strokes.  I didn't have her brushes so my brush strokes are less defined.  For the first tag, I painted on two different colors of heavy body paint and then spritzed it with water.  I really like the effect which you can see below.  


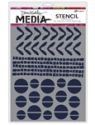
Next I did several layers of stenciling, also using the heavy body paints.  


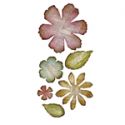
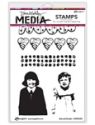
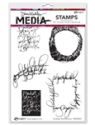
I added some hand doodling and couldn't resist adding a die cut leaf that I painted and stamped with one of Dina's script stamps.  


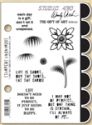
I finished it off by stamping, coloring and fussy cutting the little girl and added a Wendy Vecchi  sentiment stamp. 


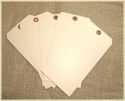
Being pleased with how the first one came out, I was on a roll and made a second tag.  


For my second tag, I just dry brushed on several colors of the heavy body paints, trying to leave brushstrokes for texture.  


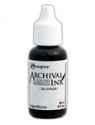
Using Jet Black archival ink, I built up layers with stamping and then stenciling with the heavy body paint.  I again used a Wendy Vecchi sentiment stamp and embellished it with a bit of burlap painted with Dina's paints.  

That's a wrap for my Friday Focus.  I hope you enjoyed it.  Please stop by The Funkie Junkie Boutique and pick up some great bargains on Dina Wakley Media products.  While you are there check out our Clearance tab as well as Pre-order opportunities and New Arrivals.  Lots of goodies there to tempt you :)

Wednesday, October 26, 2016

A Very Vintage Halloween

Hello and welcome! Zoe here hosting the latest Frilly and Funkie challenge. With Halloween just around the corner, I have chosen "A VERY VINTAGE HALLOWEEN" as the challenge theme. It's time to get your witches hats on and create a project in a vintage style with a Halloween theme.

The winner will earn the chance of a Guest DT spot here at Frilly and Funkie, and everyone who enters and follows the rules will go into the draw for the chance to win a $25 spending spree at The Funkie Junkie Boutique. And there are Top 3 Badges for three further outstanding entries, chosen by the Design Team, because choosing just one winner is so hard!

The guidelines for entering are simple: create a new vintage or shabby chic project following the challenge theme, link it below to your post (not just your blog) and also include a link back to this challenge in your post. You can combine our challenge with up to 10 challenges (including this one) to be in with a chance of winning. If you are entering through a public forum please use keyword F&F. Also, please be sure to turn off your Word Verification so our Design Team can leave comments on your blogs.

This week we are thrilled to welcome a very special Guest Designer who is joining the Funkie side of the team to share their spooky vintage creations;

Sara Emily Barker - Guest Designer -

Jenny Marples - Pushing The Right Buttons

Suzanne Czosek - Suzz's Stamping Spot

Zoe Hillman - iGirlZoe

**************************************************
WEEK ONE

This week we are thrilled to welcome a very special Guest Designer who is joining the Frilly side of the team to share their spooky vintage creations;

Annette Green - Guest Designer -

Kathy Clement - Kathy by Design

Cec Wintonyk - CW Card Creations

Pamellia Johnson - My Little Craft Things

Now it's your turn to share your vintage Halloween projects here at Frilly and Funkie! Enter your projects below and remember to come back next week to see some more vintage Halloween projects from the Funkie side of the Design Team. And of course tomorrow our latest winning Guest Designer will be joining us to share her own Halloween creation.

Zoe


Monday, October 24, 2016

Challenge Winners - Author, Author

Here we are at the beginning of a new week and it's time to announce our latest Frilly and Funkie challenge winners. Thank you so much to everyone who took the time to enter our 'Author, Author' challenge. The Design Team were so excited to see all the wonderful entries you created and had lots of favourites to choose from. This time our overall winner is #11 JulD handmade.


This fabulous journalling depicts Homer's epic Odyssey and includes so many wonderful elements - certainly a worthy winner. Congratulations JulD on being our favourite for the 'Author, Author' challenge and winning the opportunity to be a Guest Designer here at Frilly and Funkie for a future challenge.

And now for the next three winners of our Frilly and Funkie Top 3 Badges; this week's choices, in numerical order, are... #4 Jenny L , #6 Carol, and #12 Chrissie!!! Please email Linda at thefunkiejunkie@gmail.com for the codes for the Top 3 badges so that you can display them proudly on your blog.


And finally Random.org has chosen a lucky winner for the $25 gift certificate to The Funkie Junkie Boutique. Our congratulations this time go to #14 Alice K!

A huge thanks from the Frilly and Funkie team to everyone who took part in this challenge and congratulations again to our winners. Please email Linda at thefunkiejunkie@gmail.com for the codes for the winner's badge and to give us your email address for the Guest Designer details (JulD) for the Top 3 badges (Jenny, Carol and Chrissie) and for the gift certificate details (Alice).

Our current challenge, 'A Very Vintage Halloween' runs through Tuesday, November 1st. We hope to see you entering this time around so that you too can be in with a chance to win.

Have a great week everyone!

Saturday, October 22, 2016

Saturday Step by Step - Halloween

Hello Everyone, Pamellia here! So glad you dropped in to Frilly and Funkie today for my Saturday Step by Step. I have put together a complete tutorial on the Halloween card I made for Zoe's "A Very Vintage Halloween" challenge. I have included my technique for Faux Granite using products from The Funkie Junkie Boutique!! I hope you enjoy!


FAUX GRANITE TECHNIQUE:

- use a dark sheet of paper, but not black. I have used Prima Salvage District. Choose a stencil and using some Prima Heavy Gesso, put down your pattern. I have used Tim Holtz Shattered.


- while the Gesso is still wet, lightly apply Distress embossing powders Pumice Stone and Walnut Stain randomly around your pattern and allow the Gesso to dry before heating with heat gun.


- spritz on a little Distress ink spray Picket Fence and then spritz on a little water so the ink runs around making marble like pools. Toss a splatter or two if you like as well.


- lightly dab a little Black Soot Distress paint here and there to create some darker areas. Presto, your Faux Granite background is done and ready to decorate!


HALLOWEEN CARD ASSEMBLY:

- using papers from the Prima - Salvage District and Graphic 45 - Precious Memories Patterns and Solids, I cut several panels and created white paper backings for each.


- a little Walnut Stain Distress ink applied to the edges and a distress tool to make the panels look old and worn. This creates a wonderful vintage look.


- cut out some ghosts and split them apart so you have three separate pieces. (turns out I didn't use the Prima doily die cut, but I have set it aside for my next project.) lol


- the stamped images are all from the Tim Holtz Mini Halloween stamp set. They were sent to me by the talented Sara Emily of sarascloset, but I have included the link below for the stamp set which is available in Linda's shop.


- time to layer all the panels and the ghosts using some dimensional foam squares and Glossy Accents.


- using the Time Holtz Tattered Florals, I cut some flowers out of canvas sheets.


- glue on your stamped images and tuck your canvas flowers in between the layers.


- I used some Prima Heavy Gesso to paint some wonderful Halloween charms white.


I have also added some flowers from Wild Orchid Crafts, a frayed ribbon flower from May Arts and some gorgeous lace, all available in Linda's shop. I splash of Picket Fence just for good measure!


- I added a sticker from the Tim Holtz Seasonal Chit Chit sticker book that says "open if you dare". I thought it was the perfect final touch for my Vintage Halloween card!


The Faux Granite technique I have shared with you today is the same technique I used on my Gothic Wedding card back in May. I hope you get a chance to try it out!


I hope you enjoyed my tutorial. Please feel free to let me know if you have any questions. There's still lots of time to enter our current challenge "A VERY VINTAGE HALLOWEEN", where Zoe is looking for you to create a vintage project with a Halloween theme! We'll be back first thing on Monday to announce the winners of our last challenge, so make sure to check in for that.

Thanks for stopping in!
Hugs, Pamellia :)

If you would like to try some of these wonderful products, they are available at The Funkie Junkie Boutique: