Monday, March 30, 2015

Challenge Winners - Bring on the Bling!

Welcome to the Frilly and Funkie challenge blog for the start of a new week, and it's time to announce the winners of the 'Bring on the Bling!' challenge. Thank you so much to everyone who took the time to enter with your amazing projects. There were lots of fabulous creations and many different takes on what might constitute 'bling' so we were really spoiled for choice when picking the winner. In the end the Design Team all voted for #30 Asia King.


You'd never believe how this looked at the beginning of the alteration process, and can you guess what was used to top an tail this beautifully glamorous mannequin? See Asia's post HERE to find out more. Congratulations Asia on being our favourite for the 'Bring on the Bling!' challenge and winning the opportunity to be a Guest Designer here at Frilly and Funkie for a future challenge.

And Random.org has chosen a winner for our $25 gift certificate to The Funkie Junkie Boutique. Our congratulations this time go to #2 Nicola (Paper Profusion).


A huge thanks from the Frilly and Funkie team to everyone who took part in this challenge and congratulations again to our winners. Please email Linda at thefunkiejunkie@gmail.com for the codes for the winner's badge and to give us your email address for the Guest Designer details (Asia) and for the gift certificate details (Nicola).

Our current challenge, 'Put a Ribbon on It!', runs through Tuesday, April 7th. We hope to see you entering this time around so that you too can be in with a chance to win. And please make sure you follow our rules; you can enter up to 10 challenges including ours, and a maximum of 3 entries per person to our challenge. Please remember to link back to our challenge in your entry and mention in your post that you are entering this Frilly and Funkie challenge.

Have a great week everyone!

Friday, March 20, 2015

Friday Focus- Distress Paint

Happy Friday everyone, Nicole here and it's my turn to share with you the Friday Focus! This Friday we get to focus on Distress Paints! And for that reason there is an extra 15% discount applied to them for the next two weeks at The Funkie Junkie Boutique.

I love having Distress Paints in my stash!  They are so versatile and offer a great punch of color. They are great for making a quick background, inking your favorite die cuts and adding color to metal embellishments! I used my Distress Paints to create a washed out background and I watercolored the Bird Crazy image!
 

To create a watercolor look simply dab a little distress paint on your craft sheet and dip your watercolor brush in the paint and apply. This creates a bold pop of color! The Umbrella Man umbrella is cut on Mat Board and yep, more Distress Paints Weathered Wood and Bundled Sage.


I wanted to make it look like it was raining. I used the Dot Fade stencil, Faded Jeans distress marker and the Spritzer. I created a mask to put over the umbrella and bird.


I cut "cherish" on watercolor paper from the new Thinlits Love die. 

Tip; Using the magnetic plate, layer your paper, some wax paper and the Thinlits die. Run through your die cutting machine 3-4 passes to get a good clean cut. The multiple passes and wax paper help your paper pop right out and reduces tearing.


I wanted to spruce up the inside. I stamped Celebrate from the new Handwritten Sentiments and stamped again from Simple Sayings, Life. Another bird is tucked into the corner.


All layered on Core Paper adds that grungy feel. 

 
Thanks so much for stopping by. I hope you will stop by The Funkie Junkie Boutique and check out our Friday Focus page to see all the yummy Distress Paints. This is my take on a Sympathy Card. I prefer creating celebration cards!
 
Below are the thumbnail links to The Funkie Junkie Boutique for all the products used in my project. Don't forget, as the Distress Paints are the Friday Focus for the next two weeks there is an extra 15% discount applied, so it's a great time to stock up!


Thursday, March 19, 2015

Welcome back to today's Guest Designer, Jennie!

It's time to welcome back today's Guest Designer, Jennie Atkinson of  Live the Dream. Jennie was chosen as the DT winner of the 'Winter Blooms' challenge for her stunning hellebores; if you've not seen them you really do need to check them out here.

Let's move on to hear from Jennie and see what she's come up with for the current challenge 'Bring on the Bling!'


Hello everyone and how fabulous it is to be back here Guest Designing with Frilly and Funkie. I find it quite amazing that I am living on a small remote Scottish island in the middle of the North Sea but sharing my work all over the world and particularly here at Frilly and Funkie, one of my favourite challenge blogs. Those of you who have known me for a while will probably have noticed that my vintage  style has changed a little over the last year with a lot more mixed media work creeping in. I really do enjoy this rather messy style of working.  It is rather experimental at the moment but great fun. It makes a great change from making paper flowers, my other passion!


For the current challenge "Bring on the Bling" I decided to alter a bottle using  a gem cluster bought ages ago, but which does not really fit my style these days. I had no idea whether it would take the gesso and paints, but I was very pleased with the final effect. The bottle was altered with gesso and Wendy Vecchi Crackle Paste and then colour added using Luminarte Primary Elements and Silks. 
Of course I had to make some flowers! The shabby roses were made using the Tattered Florals die and my paper sprayed with the Primary Elements. 


I also altered the metal butterfly and leaves using the same products. This was such a fun project and if you would like to visit my blog Live the Dream there are a few more photographs and details. Thank you so much for inviting me to be here today - it is a great honour. Thank  you!
I'm sure you'll all agree that Jennie's project is another stunning piece of art ! Thank you Jennie, I'm sure this will have provided lots more inspiration for the current challenge 'Bring on the Bling!'

Wednesday, March 18, 2015

Bring on the Bling!

Hi everyone and welcome! Jenny here as your host for the second week of our challenge theme, 'Bring on the Bling!' Be it diamonds, pearls or even glitter we need to see some sparkle on your vintage or shabby chic projects this time. The winner will earn a Guest DT spot here at Frilly and Funkie, and everyone who enters will be entered into the draw to have the chance to win a $25 spending spree at The Funkie Junkie Boutique.

The guidelines for entering are simple: create a new vintage or shabby chic project following the challenge theme, link it below to your post (not just your blog) and also include a link back to this challenge in your post. You can combine our challenge with up to 10 challenges (including this one) to be in with a chance of winning. Make sure you follow these rules as unfortunately we have had to eliminate entrants from the prize draws in the past when they have entered too many other challenges. If you are entering through a public forum please use keyword F&F. Also, please be sure to turn off your Word Verification so our Design Team can leave comments on your blogs.

As it's Week Two it's the turn of our Funkie team to provide more inspiration;


Jenny Marples - Pushing The Right Buttons

Sue Carrington - Stamping Sue Style 

Linda Coughlin - The Funkie Junkie


*************************************************
WEEK ONE

We are starting with some inspiration from our Frilly team (plus an interloper, for one week only!);


Cec Wintonyk - CW Card Creations

Jenny Marples - Pushing The Right Buttons

Now it's over to you... everyone is invited to join in and share your amazing creations with us to be in with a chance to win. And tomorrow we'll be unveiling the gorgeous creation from our Guest Designer (a previous challenge winner) so don't forget to come back and share in the excitement!

Take care of yourselves, Jenny xxx


Monday, March 16, 2015

Challenge Winners - It's Time for a Vacation

Welcome to the Frilly and Funkie challenge blog for the start of a new week, and it's time to announce the winners of the 'It's Time for a Vacation' challenge. Thank you so much to everyone who took the time to enter with some fantastic projects. There were so many fabulous creations on display and we were really spoiled for choice when picking the winner. In the end the Design Team voted for #6 Serafeena.


If ever something fitted the description 'small and perfectly formed' then this is it! We absolutely adored the attention to detail and the hidden surprise (you'll need to see her post to find out what that is... ) Congratulations Serafeena on being our favourite for the 'It's Time for a Vacation' challenge and winning the opportunity to be a Guest Designer here at Frilly and Funkie for a future challenge.

And Random.org has chosen a winner for our $25 gift certificate to The Funkie Junkie Boutique. Our congratulations this time go to #3 Donna Mundinger.


A huge thanks from the Frilly and Funkie team to everyone who took part in this challenge and congratulations again to our winners. Please email Linda at thefunkiejunkie@gmail.com for the codes for the winner's badge and to give us your email address for the Guest Designer details (Serafeena) and for the gift certificate details (Donna).

Our current challenge, 'Bring on the Bling!', runs through Tuesday, March 24th. We hope to see you entering this time around so that you too can be in with a chance to win. And please make sure you follow our rules; you can enter up to 10 challenges including ours, and a maximum of 3 entries per person to our challenge. Please remember to link back to our challenge in your entry and mention in your post that you are entering this Frilly and Funkie challenge.

Have a great week everyone!

Saturday, March 14, 2015

Saturday Step by Step - Going Green

Hello Everyone! Glad you dropped in to Frilly and Funkie today. Pamellia here with my Saturday Step by Step. I have put together a card for a friend using some products that just arrived from The Funkie Junkie Boutique!!

I would like to share a couple of techniques with you today that probably aren't new to most of you, but I enjoy them and I get a lot of use out of them. I hope you will too.

The first technique involves creating a shadow by offsetting your stencil before applying texture paste. The second technique is one that I use it for three reasons. It involves covering your texture paste with embossing powder while it is still wet. The first reason I use this technique is for changing the colour of the paste, a good option when you don't have access to pre-coloured pastes, especially metallics. The second reason I use this technique is to create a resist, so you can use your ink sprays without changing the colour of the paste. The third reason for this technique is to keep your paste nice and white even when applied over top of dye ink backgrounds.

OK, on with the show.


I cut out two circles from white card stock. I spritzed some Shabby Shutters and Bundled Sage distress sprays on my acrylic block. I spritzed a little water and then pressed it on top of the paper to get a really cool splotchy pattern.This is a fairly common and simple technique that I do not use often enough!


Technique #1 - I refer to it as "Bumping" (Thanks Chris for the wonderful name). I used the Rays stencil from Tim Holtz and some Walnut Stain distress ink to apply the pattern. I placed the stencil back down on the pattern and lined it up and then "BUMPED" it just a little so it wasn't quite exact, before using some texture paste. It gives the texture paste pattern the appearance of having a shadow!!

Using Technique #2 - to keep your texture paste white. Very quickly, while the paste is still wet, cover it with white embossing powder and then set it aside to dry. As the paste dries, it will soak up the colours from the distress inks. Sort of unsightly, especially when making Christmas cards. So this is where the embossing powder comes in to play. After the paste is dry, heat up the powder and presto, your texture paste design is nice and white again!


For the main panel, I used the Tim Holtz Distress Damask set and Wendy Vecchi's Potting Soil ink to lay down a pattern. Then I applied some Wendy Vecchi crackle paste through Tim's Latticework stencil and quickly threw on some clear embossing powder.


Using Technique #2 - as an emboss resist. When the paste dries, heat and melt the powder. Now I can take my Shabby Shutters and Bundled Sage ink sprays and squirt to my heart's content...all you have to do is take a tissue and dab the stain off! The stain only colours the blank areas and the cracks in the paste! Isn't that fun! The advantage of this technique is being able to allow the sprays to pool in the recesses without changing the colour of the paste design, which is especially useful when using coloured paste.


I used some Ranger alcohol ink to colour one of the beads from Spellbinders new Gilded Rosary sets. These are gorgeous bead strands, which you can use as is, or pop a single bead off like I did here.


I coloured the Elizabeth Crafts dragonfly with three shades of Distress ink and then used some Glue N Seal Matte to coat the dragonfly with Distress Glitter Rock Candy. I cut out a second dragonfly in white and carefully cut it up the middle. Glueing each piece ever so slightly off to the side to make it look like the bottom dragonfly is bigger.


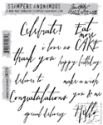
I threw in some layers of Kraft paper and white Prima doily die cuts to break up the green. I made some roses out of the Tattered Florals die, coloured them with Antique Linen and Walnut Stain distress inks and covered them with Rock Candy glitter. I added some foliage from the Garden Greens die, some pretty pearls, bronze corners and twine bow. It's not my friend's birthday so I used "Just Because" from the Chit Chat stickers as the sentiment.


Here are some cards I have made in the past using embossing powder and texture paste techniques. For this first one I used Ranger Copper embossing powder on white texture paste with the Prima Flourish stencil to get this wonderful effect.


For the second one I used Bronze embossing powder and then sprayed it with Lindy's Moonshadow Mist Buccaneer Bronze.


For this last one I took it one step further. I used clear embossing powder on an iridescent paste through a Prima Decor stencil, but then I dabbed it with my stippling brush before I heated it up, so there was little gaps. Then I sprayed with Moonshadow Mist. Some sank in and some rubbed off...a wonderful glistening don't you think.


I hope you enjoyed my tutorial . Please feel free to let me know if you have any questions and I would love to see any creations you make! There's still time to enter our current challenge "Bring on the Bling", where we are looking for your shabby or vintage creations showing us diamonds, pearls or even glitter! And we'll be back on Monday, March 16th to announce the winners of our last challenge, 'It's Time for a Vacation' so make sure to check in for that.

Thanks for stopping in!
Hugs, Pamellia :)

If you would like to try some of these wonderful products, they are available at The Funkie Junkie Boutique: