Monday, July 30, 2012

Altered Metal Challenge Winner

It's winners day again and we are happy to share the designers' choice for the Funkie Favorite of the Altered Metal Challenge.  A huge thank you to everyone who shared their awesome metal creations with us.  We loved visiting all of you and are so we thrilled that all of you played along.

We have chosen Suzanne B. of Suzanne's Papercrafting as our Funkie Favorite.  Here is Suzanne's amazing altered metal creation.
Wow, look at this incredible Steampunk 12x12 deep edged canvas Suzanne made.  Her metal mesh is sensational with that terrific rusting technique she used.  Stop by Suzanne's blog to see all the other wonderful details.  Congratulations Suzanne!!!

And we have our random winner too.  Up for grabs was a $25 gift certificate for The Funkie Junkie Boutique.  The winner is Donna Gibson #22.  Congratulations to Donna and happy shopping.
Both winners, please email me at thefunkiejunkie@gmail.com for your winner's badge or gift certificate code.  And thanks again to everyone who participate.  We hope you will all be back for our current Renaissance Men challenge.

Saturday, July 28, 2012

Saturday StepxStep: Faux Leather

Happy Saturday Frilly & Funkie lovers!!!! Anita Houston here for this StepxStep, I decided to bring you another video tutorial, (Thank you for the kind comments on the last one!) and this time showing my favorite technique that I learned at Ranger U...Perfect Pearls Faux Leather, using Inkssentials Ink Refresher. I hope you enjoy it!
The Completed Tags:
 
I hope I have inspired you to make something fabulous! And remember, if you make anything using a product that you've purchased from the Funkie Junkie Boutique you can enter it into the "Sunday Share" which throws your name into the random number generator for a chance to win a voucher for the Boutique!

Supplies:

Sunday, July 22, 2012

Sunday Share

Hello everyone and welcome back to Sunday Share.  This past fortnight, we had five customers of The Funkie Junkie Boutique share what they have made using products from the shop.  Thanks so much to all of you who shared your wonderful creations and gave my shop lovely shout-outs!  Our winner, selected by Randon.org this time is Iley Burkett.

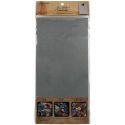
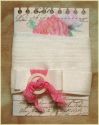
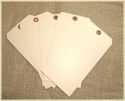
Here is the wonderful masculine card Iley made with the Library Pockets and Cards from The Funkie Junkie Boutique (closed now for vacation until August 5th).  Terrific work, Iley, using these cool card making supplies!


Thanks again to everyone who shared their work with our Sunday linky party. Hope to see you all back again next week and even more of you! I want to invite all of you to share your art made using items from TFJ here on Sunday Share. What is Sunday Share all about? Since this blog is sponsored by The Funkie Junkie Boutique, I want to have a place where my customers can share what they have made with items from the boutique. It's a linky party and you can share any creation here that has not been previously been shared here at Sunday Share. It does not need to be a new project but you cannot share the same thing here more than once. If you need some guidance in knowing how to share your work here, read this post and let us know if you need further assistance. To be eligible, just share with us something you have made with items from the boutique and provide a link in your post to The Funkie Junkie Boutique so others can check out all the great offerings and awesome prices!

SundayShare is currently running for two weeks, every other Sunday from 5:00 a.m. ET until midnight on Saturday night. We will do a random drawing of all the entires that week and the winner will receive a coupon to shop with a 25% discount at the shop. This is our little way of rewarding those who shop at The Funkie Junkie Boutique. What are you waiting for. I know lots of you have already purchased items from The Funkie Junkie Boutique. Link them up here - it's a great opportunity to share your work with us and you just might shop next time for 25% OFF!

Saturday, July 21, 2012

Saturday StepxStep

Hi, it's Sue here and it's my turn to share with you the StepxStep for this week. I needed to make a birthday card for my God Daughter so thought I'd combine the two together!


As always I started with the background and I had in my head an image of those large round lollie pops with the swirl in the centre. This led me to one of the little free stamps that come with the Craft Stamper magazine.


I decided to use the resist technique using acrylic paint and in this case I've used the Snow Cap Paint Dabber. 


 Once stamped I then dried it off with my heatgun. It's important to make sure the paint is completely dry or else when you do the next step you could end up with a sludgy mess !


 I used Spun Sugar Distress Stains over the stamping, spritzed some kitchen roll (towel) with water and lightly wiped over the top. As the acrylic paint resists the Distress Stains the swirls still show through as white.


I used a combination of Spun Sugar, Worn Lipstick and Victorian Velvet on white card stock for the main image (apologies I forgot to photo the card once I'd stamped the little girl!). The stamp is from the Artistic Outpost stamp set called Flower Market. I cut her out using a Nestability.


The embossed panel is made using the Honeycomb EF and I've wiped Spun Sugar Distress Stains on the inside of the folder before embossing the card.


The fabric layer is made using a piece of Crinoline which I've frayed the edges using a pokey tool - much quicker than  doing it with your fingernails !


I used the Worn Lipstick Distress Marker and scribbled the colour onto my craft mat. I picked the colour up with my water brush and lightly went around the edge. The fabric sucks up the liquid and therefore takes the colour with it.


I cut the metal heart using a Sizzix die and then used part of a Ten Seconds Studio mold for the letter 'L'. I've used some household decorating filler to fill the back of the letter so it doesn't get squashed ! I went around the edge with the wheel and then I used the Snow Cap Paint Dabber to distress it a little.


I used the Tattered Banner die for the sentiment and the candles are stamped using second generation stamping to create the border.

Remember if you make anything using a product that you've bought from the Funkie Junkie Boutique you can enter into the Sunday Share with the chance to winner a money off voucher for the store!

Thursday, July 19, 2012

Texture Challenge Winners

We're back again today with another winner's post, this time to announce the winners in Sue's texture challenge that closed last week. And my apologies for the delay in getting this announcement out. It seems like I am trying to juggle too many things right now and definitely dropped the ball on that one!

Our team LOVED all the wonderful entries for the texture challenge. As always, it's so tough to narrow it down to one winner overall, but we worked at it and ultimately decided that our Funkie Favorite for the Texture challenge is #43 Ana with this stunning vintage notepad.
Isn't it just the coolest? Personally, I would love to make something like that! And it wowed the design team too. Congratulations Ana.

And for our random draw winner, our friendly Random.org machine has picked entry #5 Maxine D. as the winner of the $25 gift certificate for The Funkie Junkie Boutique.
Congratulations again to both winners. Please email me at thefunkiejunkie@gmail.com for your prize codes. Thank you so much to everyone who joined in this fun challenge. Hope you will be playing with us in our current altered metal challenge which closes on July 24th.

Wednesday, July 18, 2012

Make My Metal Altered!

Hello and welcome back to our second week of the Altered Metals challenge.  This week, our Funkie team has some wonderful inspiration and if you haven't already joined in the challenge, I'm sure these samples will get you going!

Marjie Kemper - She Who Stamps and Scraps

Linda Coughlin - The Funkie Junkie

Terry Horrall - Terry's Work In Progress

Anita Houston - The Artful Maven Haven

Thanks so much for stopping by today and a huge thanks if you have already played along with us. If not, there is still a whole week to join in the altered metal challenge with us.

*********************************************
Week 1 Post
Greetings Frilly and Funkie Friends!  So happy to have you back with us again this week.  We had so much sensational work submitted for Sue's texture challenge.  Thanks so much to everyone who participated.  Be sure to check back on Monday to see who the winners are this time around.

Linda here, kicking off a brand new challenge today.   It's no secret that I love altering metals.  For this fortnight I'm asking you to have some fun with us and show us your favorite way of altering metal.  Let's see what our designers have to get you started:

Teresa Kline- Paperie Blooms
Sue Carrington - Stamping Sue Style

Linda Coughlin - The Funkie Junkie

Tammy Roberts - Paperie Sweetness

Our challenge offers two opportunities for prizes - a random drawing for a $25 gift certificate to shop at The Funkie Junkie Boutique and a best project competition, judged by the voting of the design team members. The Funkie Favorite winner receives a winner's badge to display on their blog sidebar.  In order to qualify for a prize, you must follow the challenge requirements and provide a link back to our challenge site in your post.

Thanks again for stopping by. Be sure to stop back next Wednesday for even more inspiration from our Funkie designers!

Whatever your style, Frilly or Funkie, you are welcome to play along with our vintage inspired challenge. You may upload your project at any time. If using a public forum, please use keyword F&F. Please be sure to provide a link back to our challenge in your post. Please please please be sure to turn off your Word Verification so our design team can leave comments on your blogs.

Saturday, July 14, 2012

Saturday StepXStep

Terry here with another Saturday "StepXStep" and I have a tag up to bat for you using the new "Word Play" die, inks stamps and other goodies of course!  Can you believe we are already midway through July!  It was really hot here yesterday at 111 degrees and I do believe we broke a record!  OK, here is my tag and the steps from start to finish!
Adhere foil tape sheet to card stock and smooth out with a brayer or credit card edge!  Once the foil is inked with alcohol inks, Bottle, Stream, Gold Mixative and Blending Solution and dried, emboss and then highlight the raised area using Archival Coffee.  Heat set and I will usually give a quick spray with Krylon  matt sealer.  For the metal plate, I used a swab to rub in some Archival Ink in the crevices and wiped off the excess.  Now we are ready to use that "Word Play" die which I just love!  Not only does it work well for "metal look" lettering, but you can add fabric mounted to chip board or grunge paper for a more 3-D effect.  Very cool and funkie!  If you want to see how this dies works with fabric, you can have a look HERE.


Foil letters size are 1 1/4 inch X 1 1/2 inch and were cut prior to embossing.


I wanted to mount my letters on corrugated card board, which was backed with a red panel.  I generously  applied Rock Candy Crackle and let that dry naturally.  Now this does take some time, so do it first thing!  Once dried, I inked it over with Vintage photo stain and let it dry and don't over saturate.  You can use the heat tool, but don't heat!   Once dry, add a few coats of Picket Fence stain and also painted a little of the PF into the recessed areas.  I used Glossy Accents to apply the letters to the corrugated CB and two way adhesive strips for the rest. 

For the background tag, I stamped Dylusions number stamp using clear embossing ink and then heat set.  The numbers were stamped randomly to create the tag background.  Inked the background and wiped off the excess Distress Ink using a paper towel.  All tag edges were shaded with Vintage Photo, along with the corrugated cardboard/red panels.  The letters were shaded with Archival Coffee.

The sentiment is from Tim, was stamped with Red Stazon Ink and embossed and then placed it on the top of the EF with a piece of card stock and ran it through to remove the raised area.  I wanted a more subtle effect, but felt it needed just a little extra interest.    
I cut the CB to the oval shape of the metal plate and adhered using Glossy accents.  The Bingo "39" was clear embossed and again attached with Glossy Accents!  This tag will be for a "Birthday."  The Bingo Card was cut from Tim's Lost and Found papers, edges distressed and shaded. 
As always, I hope that I have inspired you and provided some useful information.  If you have any questions, just let me know.  Thank you for stopping by and have a wonderful Saturday!